Now that you've trimmed all of your photos and have gotten an idea of how you'd like to arrange them on the pages, you're ready to begin scrapping! I'd also like to add that a very good tool to have on hand is a corner rounder. This is a small hand - held device that when using, feels sort of like a hole punch. What it does is it gives your photos nice, round corners. I've found that I like to do both rounded corner and straight edged photo layouts. Again, it's a personal preference.
What is the theme of your first layout? By this time you'll have already chosen your background pages that coordinate with your theme. Next, if you like the way matted photos look, you should choose what type of matting paper will look best with your photos and your theme. Once you've decided on this paper, you'll take your photos one at a time and lay them on the matting paper. Depending on what you like, you can use your cutter to make your matting narrow or wide. Later on after you've completed a layout or two, you can also double or even triple mat your photos. For this one though, let's just try single matting. There is also the option of using no matting at all. Whatever you choose to do is perfectly fine. Once the matting paper is cut, you'll need to put adhesive on the back of your photos to adhere them to the matting paper. For this, a tape dispenser is easy and quick. Once all of your photos are matted, then you can again lay them on the backround page and get a more precise idea of exactly how they will be glued down. When you are sure of how you'd like them arranged, go ahead and proceed with the gluing.
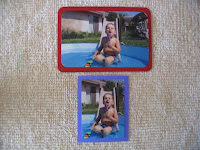
Here are two examples of single - matted photos. One is straight - edged, and one is with rounded corners.


0 comments:
Post a Comment